First Android Game - Part 1June 9, 2023This is part 1 of making my first Android Game. This blog will describe what I encountered while making my first Android game. I am using 2021.3.16f1. I wasn't familiar with how the UI would look on a phone vs in editor. Below is in the EditorOn the phone in vertical mode. You can see the player is in the wrong position. This may be due to the UIs being in world spaceOn the phone in horizontal mode. You can see the UI does not span across the phoneI was also unsure what happens on a phone when I do GetMouseButtonDown. So I tested out the code below and turns out GetMouseButtonDown is same thing as tap on the phoneSo now that I know an android build works on my Samsung Galaxy S10. I need to come up with a game, UI design and decide if my game will stay in one orientation or not -vertical, horizontal or both. I wanted to make a game called tomato vs potato. It is similar to Kids Next Door: Operation Graduation or those endless runner space shooting games. The idea is there are potatoes being shot at the player which is the Tomato. Below is an example of Kids next door: Operation Graduation looks likeWhile UI design was important, I wanted to get all the basic functionality in - kind of whiteboxing it. My next goal was to have the player spawn bullets using object pooling. I followed the tutorial from Introduction to Object Pooling Unity Tutorial. My PlayerBulletPoolInstance script was the same as the tutorial. My Player script is where it is spawning the bullet. Every x amount of seconds I would spawn a bullet, to "spawn" a bullet, I am setting the bullet to the player's position and enabling the bullet using SetActive(True). This is because all the bullets have be Instantiated at the Start() in PlayerBulletPoolInstance.csThe bullet itself has the logic to move itself upward. In OnEnable() it will wait for 3 seconds before disabling it, because at this point the bullet is already out of the screen. However, if the bullet collides with the enemy, then it will be disabled.Using a capsule to test as an enemy and a square as a bullet. I added Rigidbody2D component with 0 gravity scale and Collider2D component with IsTrigger enabled to bothBelow is how I tested. Notice in the inspector that 20 bullets get spawned and they get disabled at the start, collide with the enemy(capsule) or after 3 secondsNow I know the basics work, I need to created my tasks on JIRAI need to design what I want my game to look like in FIGMA. I made sure to prototype so I know which window opens when a button click occursNow instead of object pooling bullets. I will object pool spawning coins. There are 3 types of coins, each coin has a different amount. When the player collides with the coin, the coin gets increased. The coins are from the Unity Asset Store: 2D Pixel Item Asset PackThe coins are being spawned from an invisible spawner. This spawner should be moving left to right along the x axis. I could of used lerp, but instead I used DOTWEENThe code just says, if the spawner collides with pointA then start moving towards point B and vice versa. Gif example shows that in the scene view, the spawner selected is going back and forth between point A and point BNow I want to animate the enemy by replacing the capsule with a sprite sheet. Using piskel, did a quick drawing- a 1 by 2 sprite sheet. I exported the sprite sheet. In the inspector, set the sprite mode to multiple. Click Apply and then opened sprite editor Following this Introdcution to Sprite Animation Tutorial I set the type to Grid by Cell Option. Instead of 9 by 3, I entered 1 by 2 The sprite sheeet gets created. I select the two sprites and dragged it into the scene view which prompts me to create an animationThe potato animation resultThe coin and the enemy were all set. I added logic so that if the player collides with the enemy, the player loses a life. If the player bullet collides with the enemy, add score to the scoreboard. If player collides with a coin, add the coin amount to the scoreboard. Using the Fantasy Wooden GUI as the backgroundMy Figma design of my game view vs the result was a little bit different, because I realized my original design seemed messy. Especially a space background that didn't make sense since it was potato/tomatos. Made more sense to have a grass background to look like a farm. In addition, the player1 and player2 information at the bottom, it made more sense to have the left and right mirror each other so it's easier to read. Below is figma designThe result of what the game looks like so far is shown belowNow that the game UI is done. I needed to move on in setting up the player hierarchy. I want to have the flexibility to change the sprite of the player's head, body, shoes. So I could not just draw one sprite that contained all the body parts of the player. So I set up the hierarchy as shown below. Each body part contains a sprite renderer component. We will come back to the player in a bitNext was to create the UIs when the user presses Pause. This would open up an option for users to buy items to customize their player's skin. When the pause button is pressed, it would set Time.timeScale=0 to pause the game. I would set Time.timeScale=1 when the user closes the menu. Below was the original Figma designHowever this prevented me from displaying what the users have bought or allow the user to go back to the start screen. So I created two UIs. The first one shown below has the "Quit" option to let the user go back to the start screen. Then there is the select button to let the user select the item they want to use. The select button is only enabled if the user selects an item. The item will display the name and a description of what it doesThe store button opens up the store menu which shows what the user can buy. The header will display how much the user has left. When the user selects an item, the name and description of that item will be displayedNow the UIs were set up it was time to test if the buttons are clickable. They were not! After further investigation. I found out that there are some factors that could cause the buttons to be unclickable. (1) Button UIs must be below Text UIs (I was using TextMeshPro UGUI) in the hierarchy (2)If you decide to have an empty gameobject that contains the Text as the first child and the button as the second child, the Text's Rect Transform -> scale field cannot be covering the button as it acts like a collider blocking the interactions with the Button. (3) Best way is to follow the way the Button gameobject is created which is Button as the parent and the text as the child. (4) If you want to place another image (that contains the image component) on the Button, similar to the text, having an empty gameobject as the parent with Button as the first child and Image as the child, the image area will block the button. (5) in a gameobject is a SpriteRenderer component and another gameobject is an Image gameobject. The SpriteRenderer gameobject will always be on the top. Make sure to change gameobjects to have Image component and the ones that are displayed on the top are placed lower in the hierarchy. Best way is to have the Button as the parent and the Image as the child. Example below are the hierarchy of the first menu you see when pause button is selected This is it for part one. Part 2 of my first android game journey can be found hereRecent blogsSee all blogs
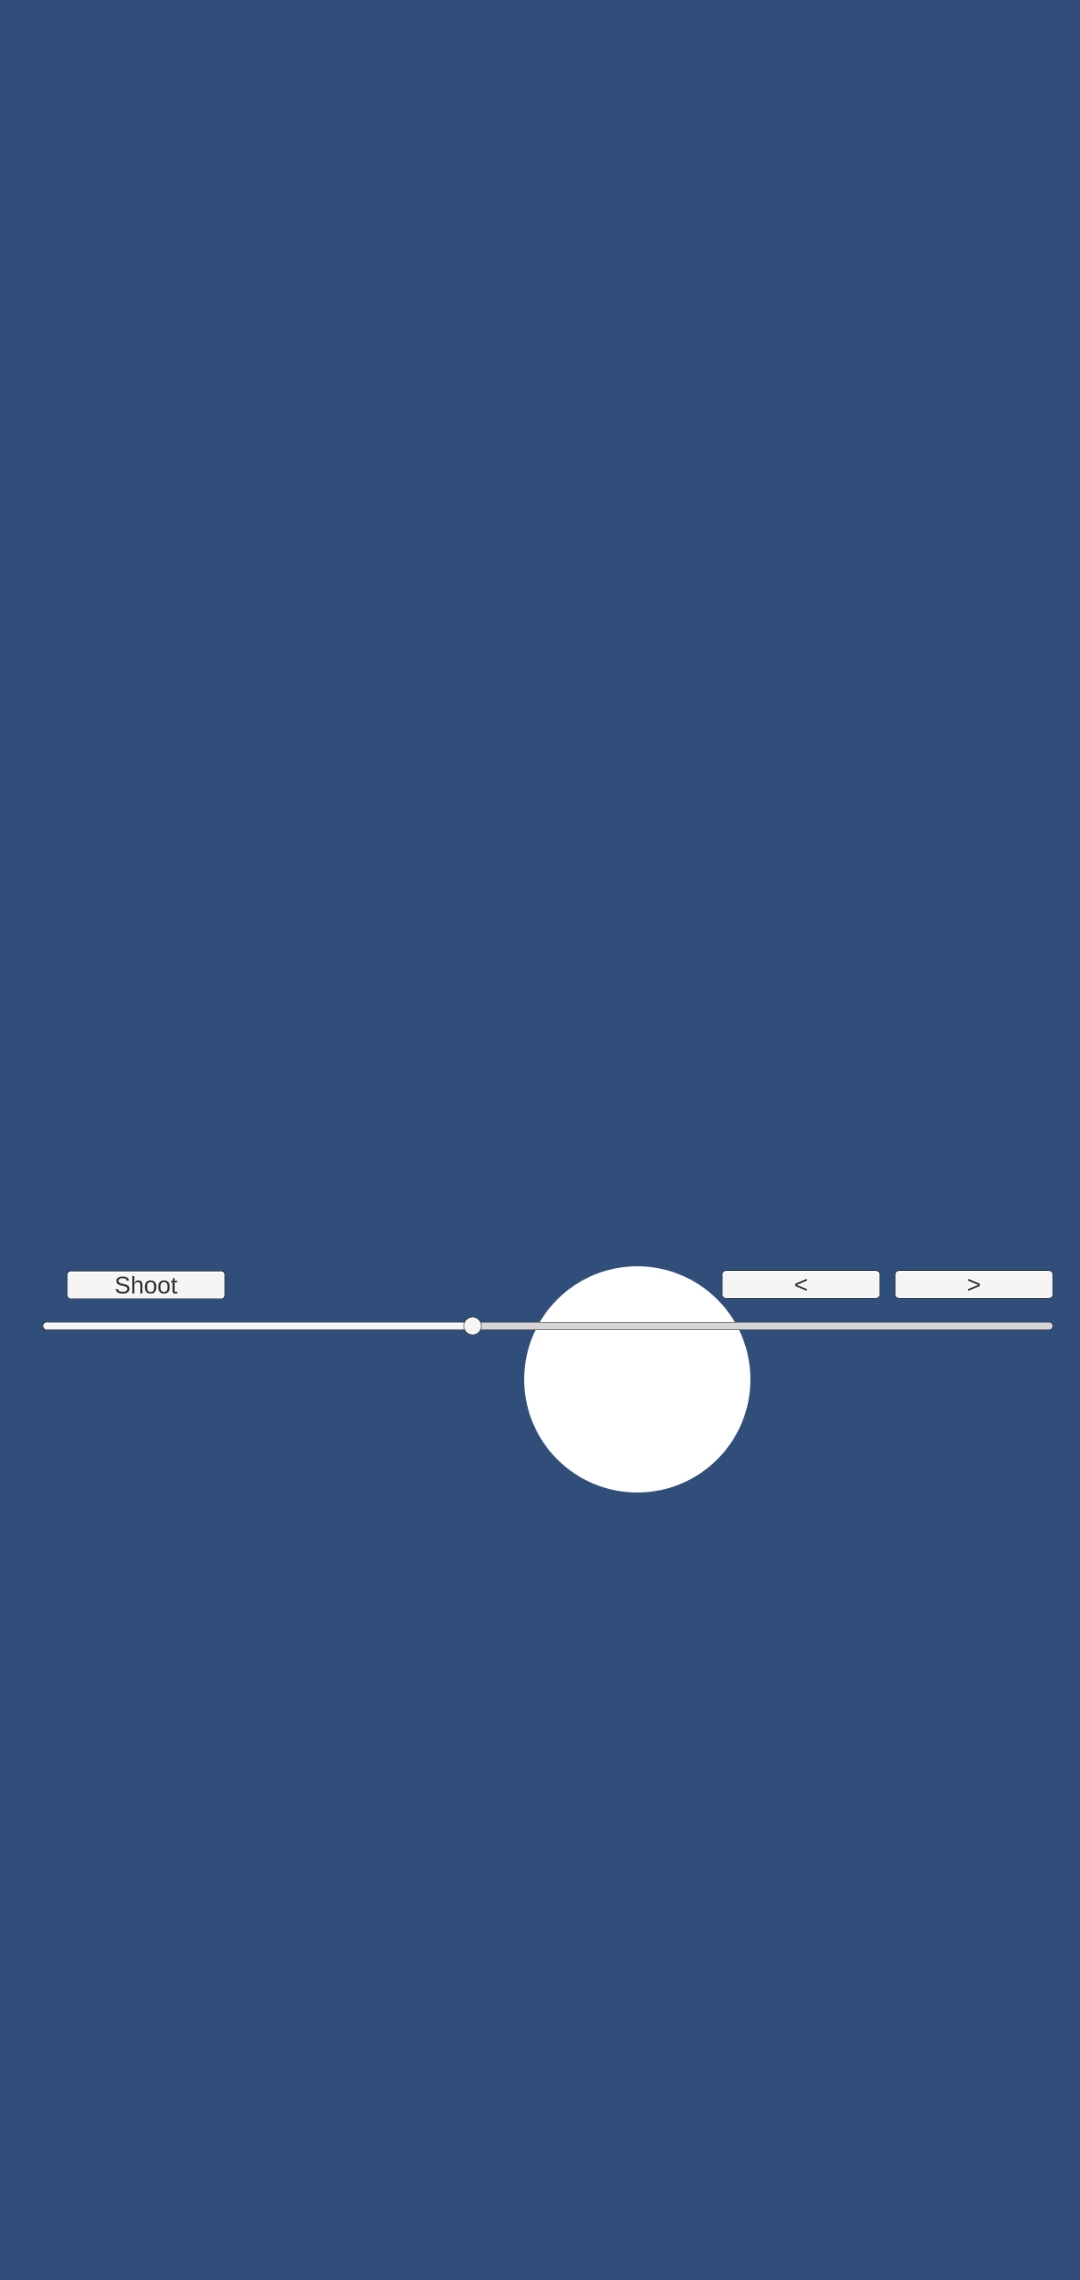
 On the phone in vertical mode. You can see the player is in the wrong position. This may be due to the UIs being in world space
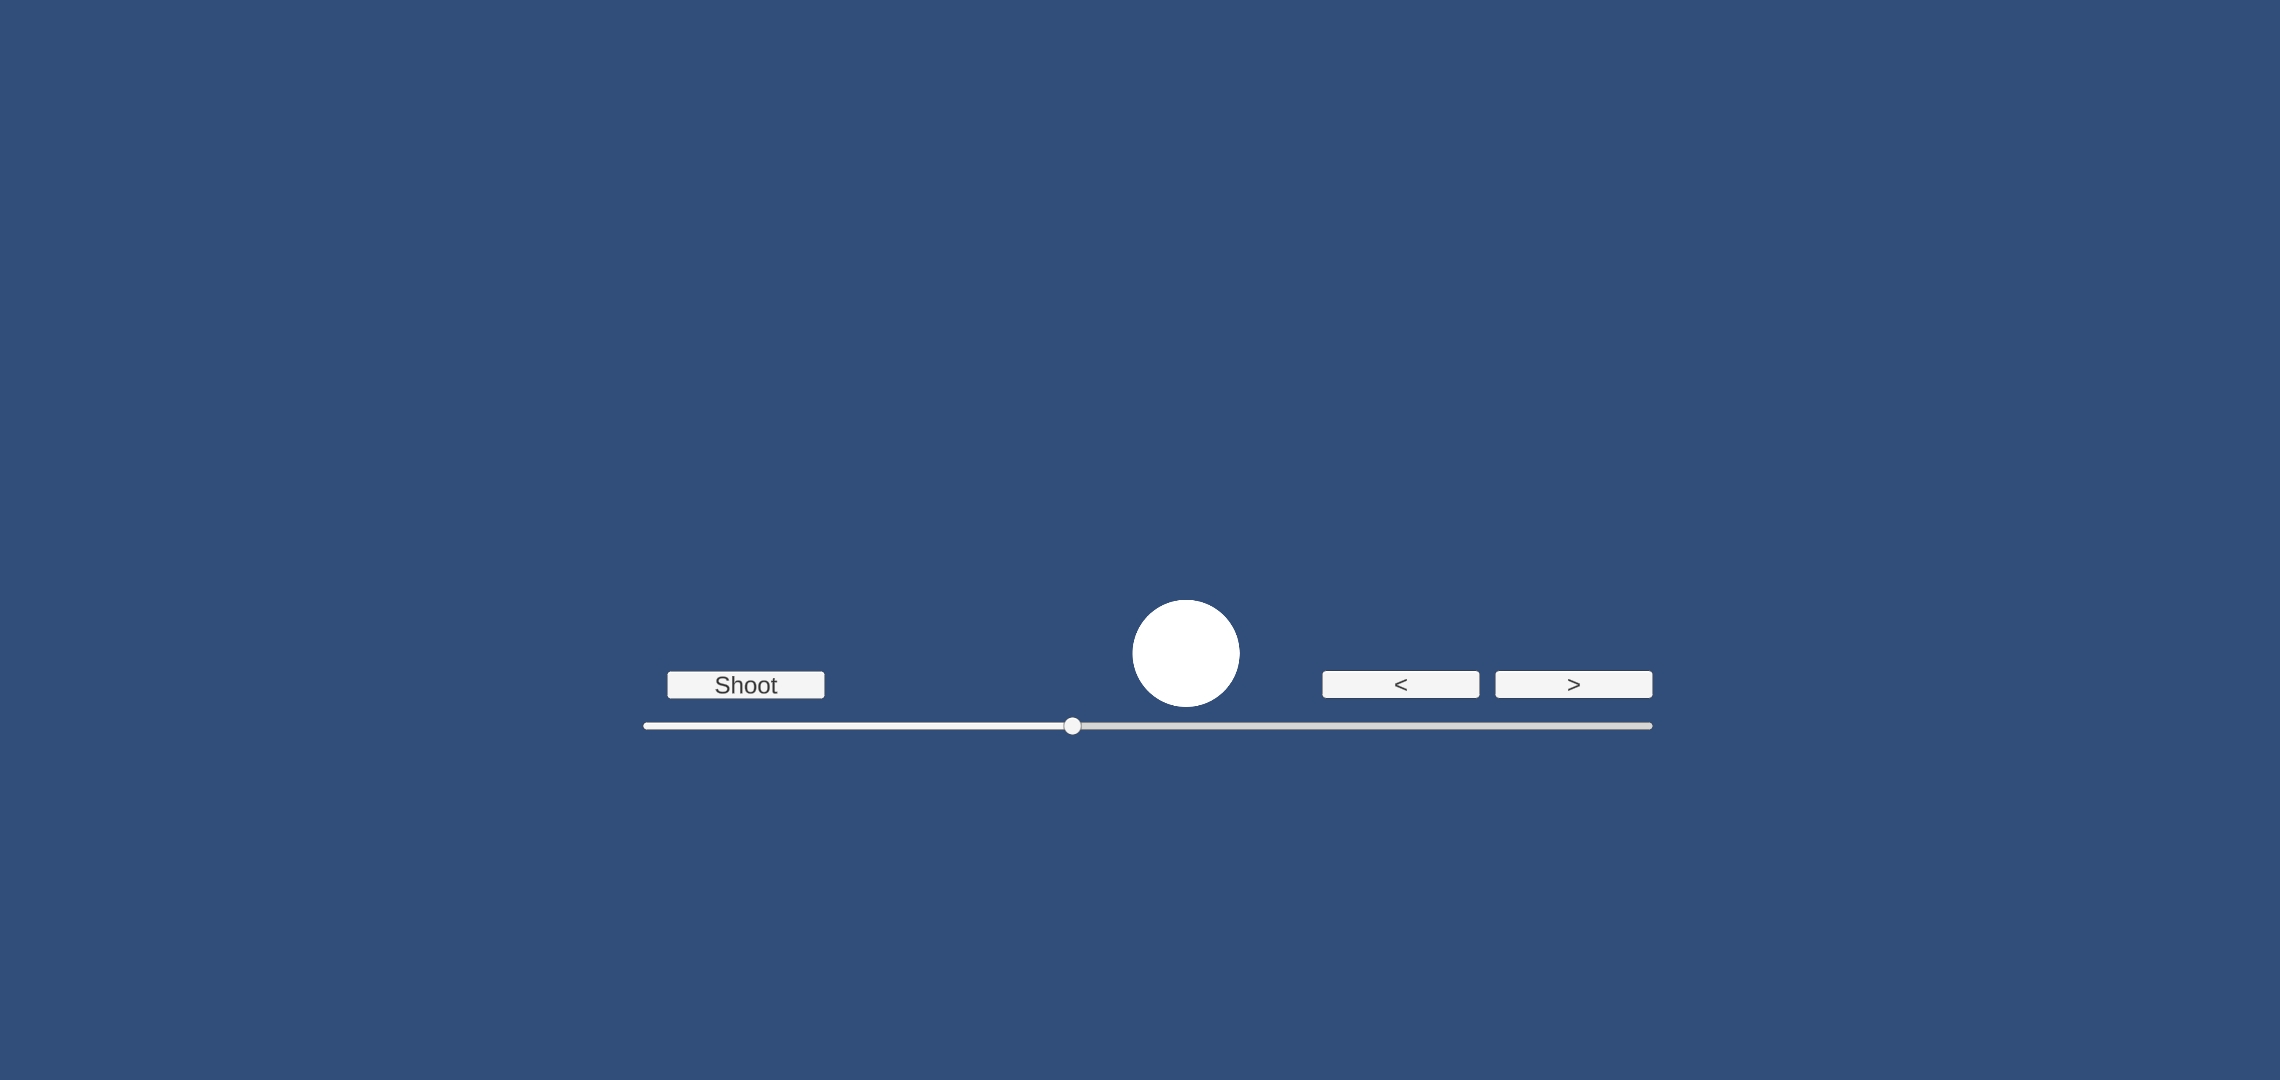
 On the phone in horizontal mode. You can see the UI does not span across the phone
 I was also unsure what happens on a phone when I do GetMouseButtonDown. So I tested out the code below and turns out GetMouseButtonDown is same thing as tap on the phone
 So now that I know an android build works on my Samsung Galaxy S10. I need to come up with a game, UI design and decide if my game will stay in one orientation or not -vertical, horizontal or both. I wanted to make a game called tomato vs potato. It is similar to Kids Next Door: Operation Graduation or those endless runner space shooting games. The idea is there are potatoes being shot at the player which is the Tomato. Below is an example of Kids next door: Operation Graduation looks like
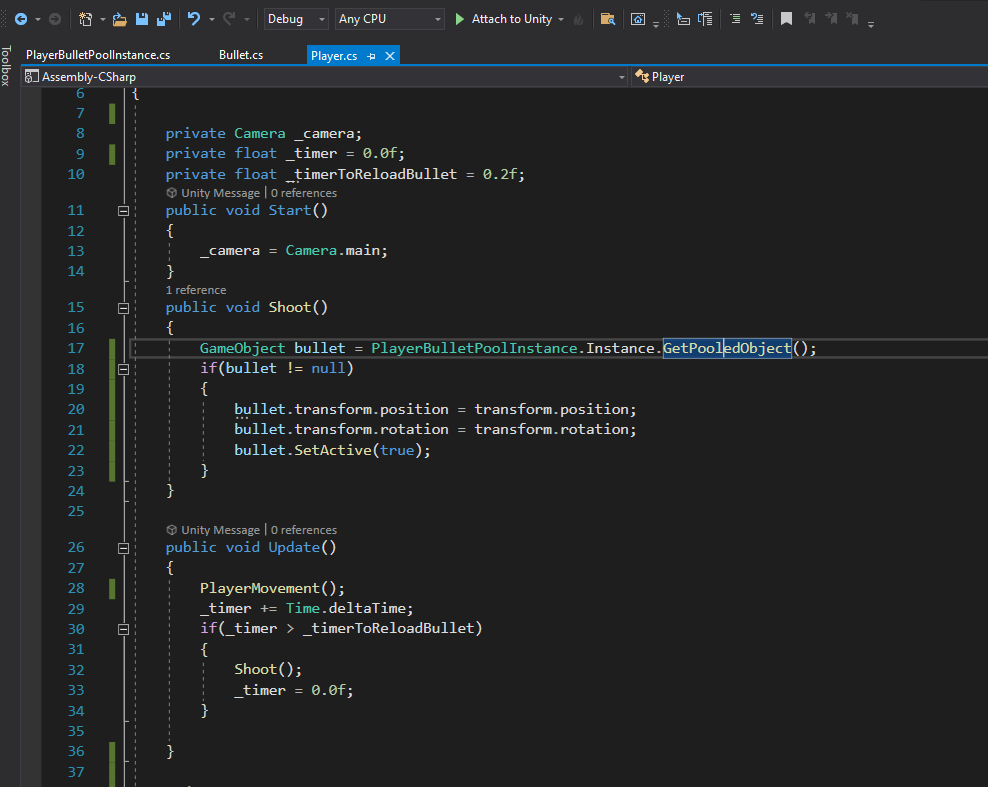
 While UI design was important, I wanted to get all the basic functionality in - kind of whiteboxing it. My next goal was to have the player spawn bullets using object pooling. I followed the tutorial from Introduction to Object Pooling Unity Tutorial. My PlayerBulletPoolInstance script was the same as the tutorial. My Player script is where it is spawning the bullet. Every x amount of seconds I would spawn a bullet, to "spawn" a bullet, I am setting the bullet to the player's position and enabling the bullet using SetActive(True). This is because all the bullets have be Instantiated at the Start() in PlayerBulletPoolInstance.cs
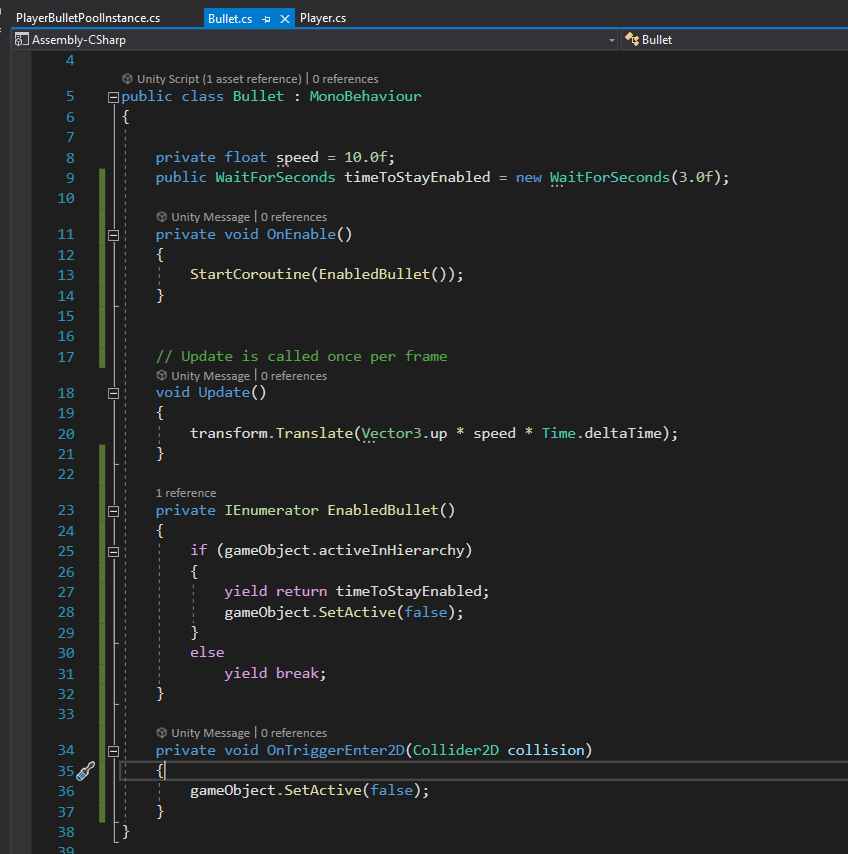
 The bullet itself has the logic to move itself upward. In OnEnable() it will wait for 3 seconds before disabling it, because at this point the bullet is already out of the screen. However, if the bullet collides with the enemy, then it will be disabled.
 Using a capsule to test as an enemy and a square as a bullet. I added Rigidbody2D component with 0 gravity scale and Collider2D component with IsTrigger enabled to both
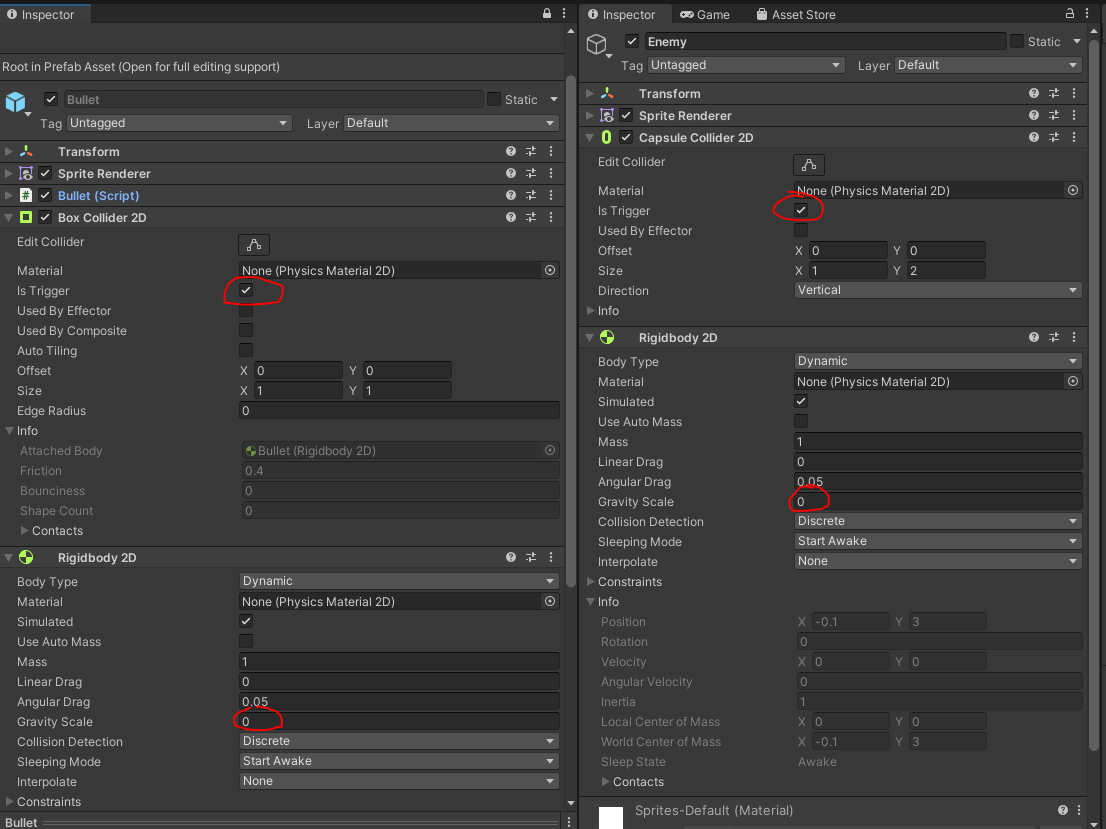 Below is how I tested. Notice in the inspector that 20 bullets get spawned and they get disabled at the start, collide with the enemy(capsule) or after 3 seconds
 Now I know the basics work, I need to created my tasks on JIRA
 I need to design what I want my game to look like in FIGMA. I made sure to prototype so I know which window opens when a button click occurs
 Now instead of object pooling bullets. I will object pool spawning coins. There are 3 types of coins, each coin has a different amount. When the player collides with the coin, the coin gets increased. The coins are from the Unity Asset Store: 2D Pixel Item Asset Pack
 The coins are being spawned from an invisible spawner. This spawner should be moving left to right along the x axis. I could of used lerp, but instead I used DOTWEEN
 The code just says, if the spawner collides with pointA then start moving towards point B and vice versa. Gif example shows that in the scene view, the spawner selected is going back and forth between point A and point B
 Now I want to animate the enemy by replacing the capsule with a sprite sheet. Using piskel, did a quick drawing- a 1 by 2 sprite sheet. I exported the sprite sheet. In the inspector, set the sprite mode to multiple. Click Apply and then opened sprite editor
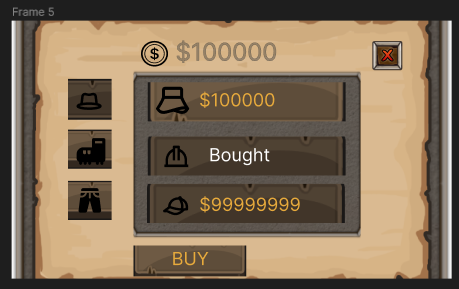
 The coin and the enemy were all set. I added logic so that if the player collides with the enemy, the player loses a life. If the player bullet collides with the enemy, add score to the scoreboard. If player collides with a coin, add the coin amount to the scoreboard. Using the Fantasy Wooden GUI as the background
 My Figma design of my game view vs the result was a little bit different, because I realized my original design seemed messy. Especially a space background that didn't make sense since it was potato/tomatos. Made more sense to have a grass background to look like a farm. In addition, the player1 and player2 information at the bottom, it made more sense to have the left and right mirror each other so it's easier to read. Below is figma design
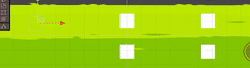
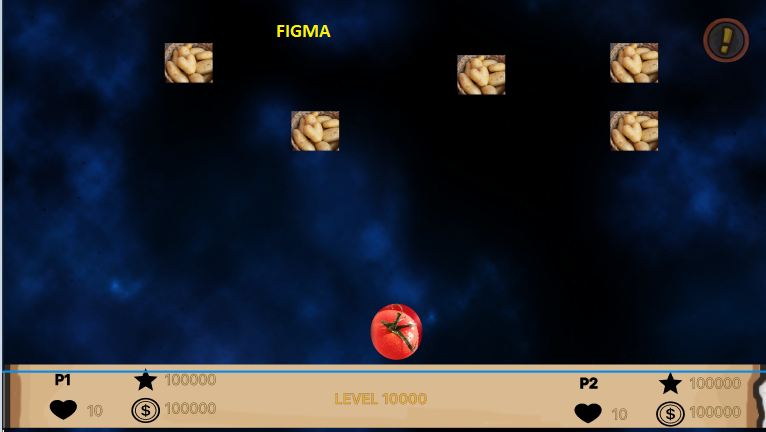 The result of what the game looks like so far is shown below
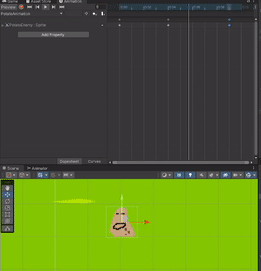
 Now that the game UI is done. I needed to move on in setting up the player hierarchy. I want to have the flexibility to change the sprite of the player's head, body, shoes. So I could not just draw one sprite that contained all the body parts of the player. So I set up the hierarchy as shown below. Each body part contains a sprite renderer component. We will come back to the player in a bit
 Next was to create the UIs when the user presses Pause. This would open up an option for users to buy items to customize their player's skin. When the pause button is pressed, it would set Time.timeScale=0 to pause the game. I would set Time.timeScale=1 when the user closes the menu. Below was the original Figma design
 However this prevented me from displaying what the users have bought or allow the user to go back to the start screen. So I created two UIs. The first one shown below has the "Quit" option to let the user go back to the start screen. Then there is the select button to let the user select the item they want to use. The select button is only enabled if the user selects an item. The item will display the name and a description of what it does
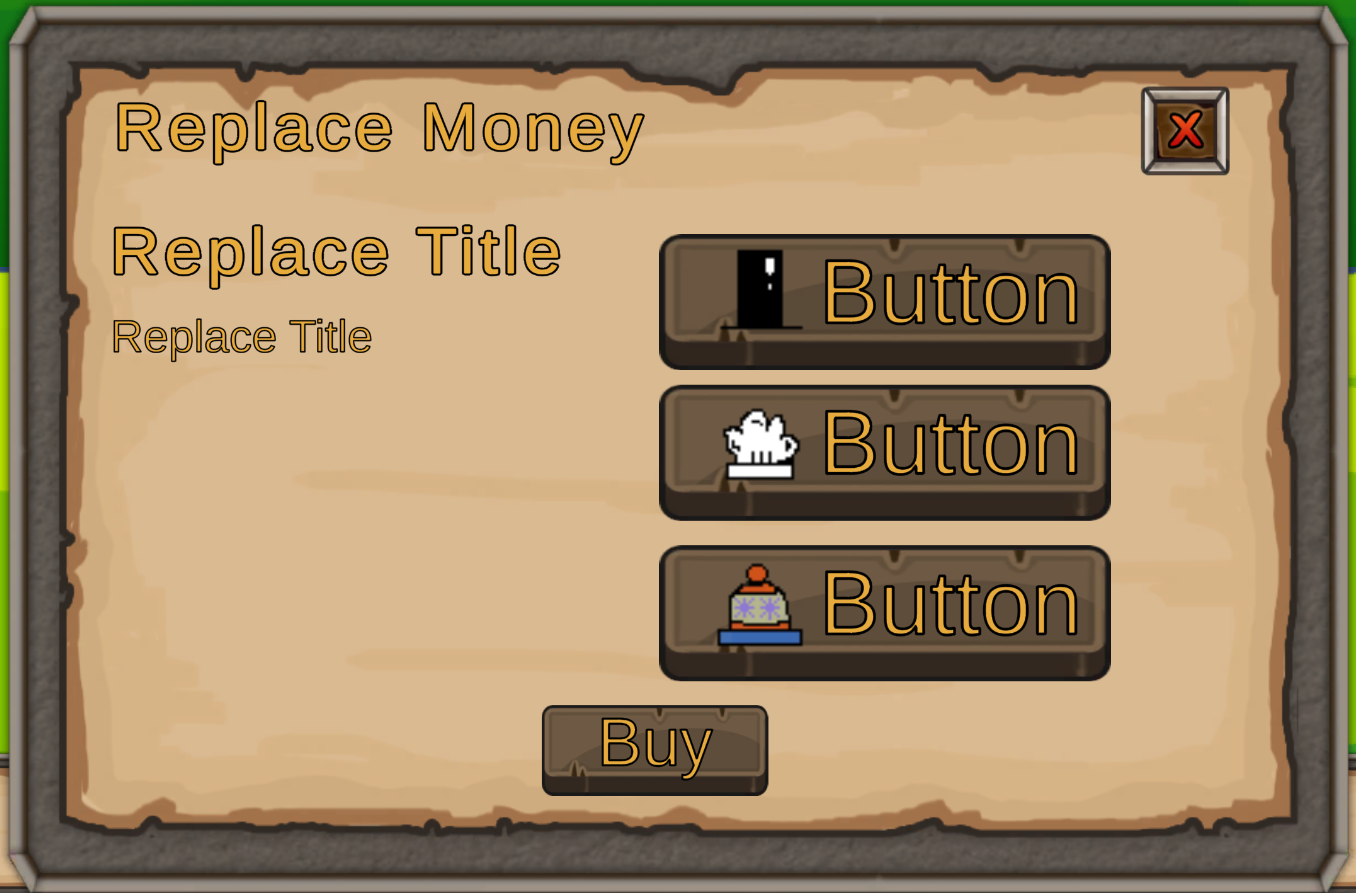
 The store button opens up the store menu which shows what the user can buy. The header will display how much the user has left. When the user selects an item, the name and description of that item will be displayed
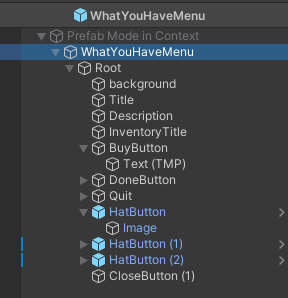
 Now the UIs were set up it was time to test if the buttons are clickable. They were not! After further investigation. I found out that there are some factors that could cause the buttons to be unclickable. (1) Button UIs must be below Text UIs (I was using TextMeshPro UGUI) in the hierarchy (2)If you decide to have an empty gameobject that contains the Text as the first child and the button as the second child, the Text's Rect Transform -> scale field cannot be covering the button as it acts like a collider blocking the interactions with the Button. (3) Best way is to follow the way the Button gameobject is created which is Button as the parent and the text as the child. (4) If you want to place another image (that contains the image component) on the Button, similar to the text, having an empty gameobject as the parent with Button as the first child and Image as the child, the image area will block the button. (5) in a gameobject is a SpriteRenderer component and another gameobject is an Image gameobject. The SpriteRenderer gameobject will always be on the top. Make sure to change gameobjects to have Image component and the ones that are displayed on the top are placed lower in the hierarchy. Best way is to have the Button as the parent and the Image as the child. Example below are the hierarchy of the first menu you see when pause button is selected
 This is it for part one. Part 2 of my first android game journey can be found here